Why Your Backhand Volley Keeps Hitting the Tin (And How to Fix It)
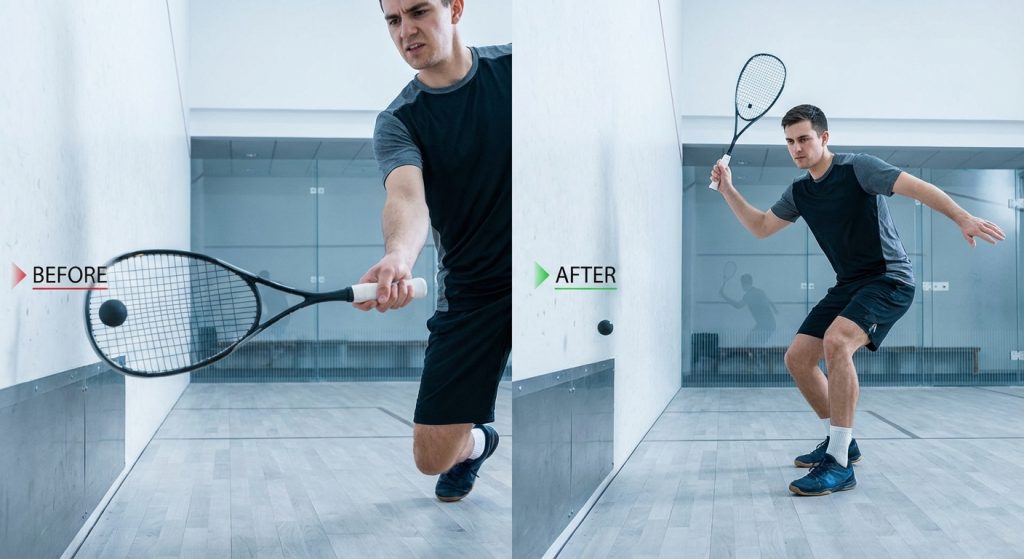
Your backhand volley has betrayed you again. The ball thuds into the tin, your opponent grins, and you wonder why this shot feels like wrestling with a stubborn opponent. The backhand volley in squash demands precision, timing, and a few technical adjustments that most intermediate players overlook. The good news? Once you understand what’s going wrong, the fixes are surprisingly straightforward.
Backhand volley errors usually stem from three fixable mistakes: dropping your wrist below the racquet head, taking the ball too late, and using excessive swing. Correct these by maintaining a firm wrist position, intercepting the ball early with your weight forward, and using a compact punch motion rather than a full swing. These adjustments will lift your volleys clear of the tin consistently.
Understanding Why Your Backhand Volley Finds the Tin
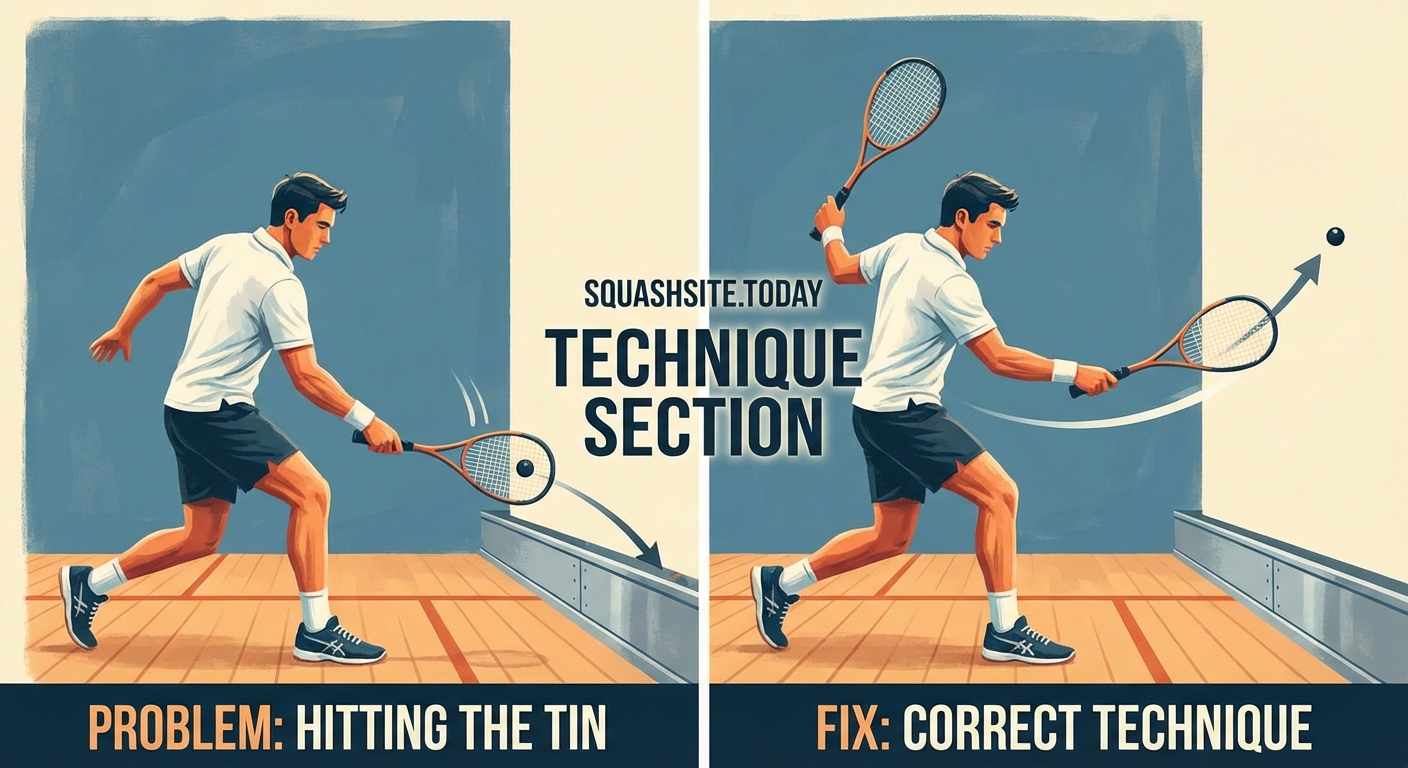
The tin is unforgiving. It sits there, 19 inches high, punishing every technical flaw in your volley technique.
Most players hitting the tin share a common problem. They’re guiding the ball downward instead of forward. Your racquet face angle at contact determines the ball’s trajectory, and when that angle points even slightly downward, physics takes over.
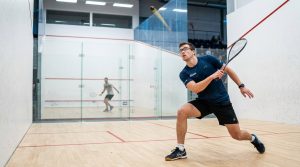
The backhand volley differs fundamentally from your backhand drive. Drives allow time for preparation and swing. Volleys demand instant reactions with minimal movement. This distinction trips up players who’ve mastered their ground strokes but struggle at the front of the court.
Your wrist position matters more than you think. A collapsed or drooping wrist creates a downward racquet angle that sends balls straight into the tin. Meanwhile, a firm wrist maintains the open face needed to lift the ball.
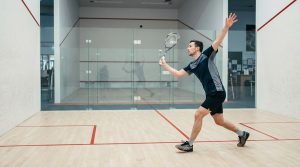
Timing plays an equally critical role. Taking the ball late forces you to reach backward, collapsing your body position and angling your racquet downward. Early contact lets you punch through the ball with your weight moving forward.
The Three Technical Culprits Behind Tin Shots

Let’s identify the specific mistakes causing your problems.
Wrist collapse tops the list. When pressure mounts or fatigue sets in, your wrist bends backward. This subtle change tilts your racquet face downward by several degrees. Those degrees mean the difference between clearing the tin and hitting it.
Late contact points create a cascade of problems. You’re reaching behind your body, your weight shifts backward, and your racquet face naturally closes. The ball has already passed the ideal interception zone.
Excessive swing length introduces inconsistency. Big swings require perfect timing. Miss by a fraction of a second and your racquet face angle at contact becomes unpredictable. Shorter, more compact movements give you better control.
| Common Mistake | What Happens | The Fix |
|---|---|---|
| Dropped wrist | Racquet face angles down, ball hits tin | Lock wrist firm, racquet head above wrist level |
| Late contact | Reaching backward, weight on back foot | Step forward, intercept ball early |
| Long swing | Inconsistent racquet face angle | Compact punch, minimal backswing |
| Passive footwork | Poor body position, off-balance contact | Active split step, move to the ball |
Five Steps to Fix Your Backhand Volley Technique
Here’s your systematic approach to eliminating tin shots forever.
-
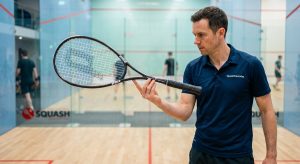
Reset your grip to continental. Place your racquet flat on the ground and pick it up from the top. This natural grip position opens your racquet face slightly and gives you the versatility needed for volleys at different heights. Many players use their drive grip for volleys, which closes the face too much.
-
Establish a firm wrist position before the ball arrives. Stand in front of a mirror and hold your racquet in the ready position. Your wrist should be locked with the racquet head level with or slightly above your wrist. This isn’t a tense grip, just a stable platform. Practice holding this position for 30 seconds at a time.
-
Master the split step timing. As your opponent strikes the ball, perform a small hop that lands you on the balls of your feet. This athletic position lets you react instantly in any direction. The split step synchronises your movement with the ball’s flight.
-
Move forward to intercept the ball early. Take a decisive step toward the front wall with your left foot (for right-handed players). This forward movement accomplishes two things: it gets you to the ball before it drops too low, and it lets you transfer your weight into the shot naturally.
-
Execute a compact punch motion. Think of your backhand volley as a firm push rather than a swing. Your racquet travels forward about 30 centimetres, no more. The power comes from your step and body rotation, not from arm swing. Keep your elbow relatively stable and let your shoulder do the work.
The best volleyers in squash treat the shot like catching a ball and immediately throwing it back. There’s no wind-up, no elaborate preparation. Just intercept and redirect. This mental model helps players understand the efficiency required at the front of the court.
Addressing the Height Problem
Different ball heights require specific adjustments to your technique.
High volleys (shoulder level and above) need an open racquet face. Your wrist stays firm but your forearm rotates slightly to expose more of the racquet face to the ceiling. Aim to contact the ball slightly in front of your body and punch forward and slightly downward. The key word is slightly. You’re guiding the ball down gently, not chopping at it.
Mid-height volleys (between waist and shoulder) represent the sweet spot. Your basic technique applies here with minimal adjustment. Focus on stepping in and punching through the ball with a level racquet face.
Low volleys (below waist height) require bending your knees, not your back. Drop your body height by flexing your legs while keeping your upper body relatively upright. This maintains your wrist position and racquet face angle. Many players bend at the waist for low volleys, which collapses their wrist and sends the ball into the tin.
The common thread across all heights? Your wrist position remains firm and your racquet head stays level with or above your wrist.
Footwork Patterns That Support Better Volleys
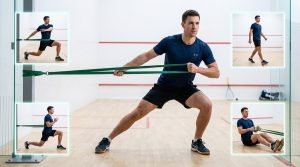
Your feet determine your body position, which determines your racquet position.
Start with an active ready position. Stand on the T with your weight on the balls of your feet, knees slightly bent. This athletic stance lets you explode in any direction.
When the ball comes to your backhand volley side, execute this sequence:
- Split step as your opponent hits
- Read the ball’s trajectory
- Step forward with your left foot toward the side wall
- Keep your right foot as an anchor for balance
- Contact the ball with your weight transferring onto your front foot
This footwork pattern naturally positions your body sideways to the front wall, creating space for your racquet to move through the ball without obstruction.
Avoid these footwork errors:
- Standing flat-footed and reaching with just your arm
- Stepping backward away from the ball
- Crossing your feet, which tangles your legs and ruins your balance
- Taking multiple small steps instead of one decisive movement
Drills to Groove the Correct Motion
Solo practice builds muscle memory faster than match play.
The wall drill works brilliantly for developing touch. Stand two metres from the front wall. Drop the ball and volley it continuously against the wall using only your backhand volley technique. Focus entirely on keeping your wrist firm and using a compact punch. Aim to sustain 20 consecutive volleys. This drill provides immediate feedback because any technical breakdown causes you to lose control.
The shadow swing routine requires no ball at all. Perform 50 backhand volley motions daily, watching yourself in a mirror or recording video. Check these points on each repetition:
- Wrist firm, racquet head level
- Compact motion, no big backswing
- Step forward with front foot
- Shoulder turns slightly, arm stays relatively quiet
The target practice drill needs a partner or ball machine. Place a target on the front wall at a height of about one metre. Have balls fed to your backhand volley position at varying heights. Your goal is hitting the target consistently while maintaining proper technique. Don’t worry about power. Accuracy and technique come first.
The drop shot masterclass: developing touch and feel for winners from anywhere shares similar principles about developing racquet control and feel that translate directly to volley improvement.
Equipment Considerations for Better Volleys
Your racquet setup influences your volley performance more than you might realise.
String tension affects ball response. Higher tensions (27-29 pounds) give you more control and a crisper feel, which helps with the compact punch motion required for volleys. Lower tensions (24-26 pounds) provide more power but less precision. For players struggling with tin shots, slightly higher tension often helps because the ball doesn’t sink into the strings as much, making it easier to direct.
Balance point matters too. Head-light racquets (balance point closer to the handle) offer better manoeuvrability for volleys. You can position the racquet faster and make last-second adjustments more easily. Head-heavy racquets generate more power on drives but can feel sluggish on volleys.
Grip size deserves attention. A grip that’s too large makes it harder to maintain a firm wrist position because your hand muscles fatigue faster. Too small and you’ll squeeze too hard, creating tension that travels up your arm. The right size lets you hold the racquet with controlled firmness without excessive grip pressure.
The truth about squash string tension and how it transforms your game provides deeper insight into how string setup affects your shot-making across all strokes.
Mental Approach and Decision Making
Technical skills mean nothing if your mental game sabotages execution.
Commit to the volley early. The moment you recognise a ball coming to your backhand volley zone, decide you’re taking it as a volley. Hesitation causes you to get caught between a volley and letting the ball bounce, resulting in awkward in-between contact points that find the tin.
Accept that some balls shouldn’t be volleyed. If a ball drops below knee height before you can reach it, let it bounce. Trying to volley balls that are too low forces you to break all the technical rules we’ve discussed. Smart shot selection prevents forced errors.
Use volleys to apply pressure, not to end rallies immediately. Many intermediate players try to hit winners off every volley. This aggressive mindset leads to overhitting and tin shots. Instead, think of your backhand volley as a way to maintain your front court position and keep your opponent under pressure. Solid, deep volleys accomplish this without unnecessary risk.
Visualise the ball’s path before you hit. In the split second before contact, picture the ball’s trajectory from your racquet to the front wall and its bounce. This mental rehearsal helps your body execute the correct racquet angle automatically.
Common Variations and When to Use Them
The standard backhand volley isn’t your only option.
The volley drop works when your opponent is deep in the court. Instead of punching the ball deep, you use an even more compact motion with a very open racquet face to just lift the ball over the tin and have it die in the front corner. This shot requires excellent touch and the same firm wrist position to control the delicate trajectory.
The volley boast redirects the ball to the side wall before it reaches the front wall. You’ll use this when the ball comes at you with pace and you need to take the sting off it, or when you want to wrong-foot an opponent. The technique remains similar, but your body faces more toward the side wall and your racquet face angles accordingly.
The attacking volley kill aims to end the rally. You take the ball very early, often above waist height, and punch it hard and low to the front wall. This requires perfect technique because any error at this speed and angle means hitting the tin. Only attempt this when you’ve grooved the basic technique and the ball sits up invitingly.
Professional players like Paul Coll’s unorthodox style is redefining power play in professional squash demonstrate how variations in technique can still produce effective results, though mastering fundamentals remains essential before experimenting with personal style.
Troubleshooting Persistent Problems
If you’ve applied these fixes and still struggle, consider these specific solutions.
Problem: Volleys clear the tin but lack depth.
Your contact point is correct but you’re not transferring enough weight forward. Exaggerate your forward step and feel your body weight moving into the shot. Also check that you’re following through toward your target rather than pulling the racquet across your body.
Problem: Technique feels good in practice but breaks down in matches.
Pressure causes you to rush. In matches, deliberately slow down your preparation. Take an extra split second to set your feet and wrist position before swinging. Better to be slightly late with good technique than early with collapsed form.
Problem: Low balls still hit the tin despite bending your knees.
You’re probably still dropping your wrist as you bend down. Practice low volleys while consciously thinking about keeping your racquet head up. It might feel like you’re scooping under the ball, but you’re actually just maintaining a neutral racquet face.
Problem: Inconsistent results even with seemingly identical technique.
Check your grip pressure. Varying how tightly you hold the racquet changes how the strings respond at contact. Aim for consistent, moderate grip pressure, firm enough for control but relaxed enough to maintain feel.
Building Long-Term Volley Confidence
Permanent improvement requires systematic practice over weeks and months.
Dedicate the first ten minutes of every court session to volley practice. This consistent repetition builds neural pathways that make correct technique automatic. Don’t wait until you’re tired at the end of practice to work on volleys.
Record yourself regularly. Video doesn’t lie. What feels like a firm wrist might actually show collapse on camera. What seems like early contact might reveal you’re still reaching backward. Monthly video check-ins keep you honest about your progress.
Track your tin percentage during practice. Count how many backhand volleys you attempt versus how many hit the tin. Watch this percentage decrease over time as your technique improves. Measurable progress motivates continued effort.
Play practice games that emphasise volleys. For example, play points where you must volley any ball that reaches you above knee height. This forces you to use the shot repeatedly under pressure, accelerating your learning.
Partner with someone working on the same skill. Feed each other balls and provide feedback on wrist position, footwork, and contact point. External observation catches mistakes you can’t feel yourself.
Your Path to Reliable Backhand Volleys
The backhand volley transforms from liability to weapon once you address the root causes of tin shots.
Your wrist position, contact point, and swing length represent the three pillars of volley technique. Get these right and the ball will consistently clear the tin with room to spare. Add proper footwork and you’ll find yourself dominating the front of the court, putting opponents under relentless pressure.
Start with the five-step process outlined above. Work through each element methodically, using the drills to build muscle memory. Be patient with yourself but persistent in practice. The backhand volley rewards consistent technical work more than any other shot in squash.
Next time you step on court, remember that every volley is an opportunity to apply these principles. The tin isn’t your enemy. It’s simply feedback telling you which technical element needs attention. Listen to that feedback, make the adjustment, and watch your backhand volley become the reliable weapon it should be.