The Hidden Power of Your Pivot: Why Squash Footwork Starts at the Heel
You step onto the court. Your opponent plays a high ball to your backhand corner, then drops a low one cross court. You move, but you are a fraction late. The ball bounces twice before you reach it. You know the feeling. Most club players think footwork is about being fast. It is not. Good footwork is about being efficient. It starts with one thing: your heel. The pivot. If your weight sits on your toes all the time, you lose the ability to change direction. You burn energy. You arrive late. These squash footwork drills are designed to fix that. They are not flashy. They are effective. And they will change how you move.
Your footwork is only as good as your ability to pivot from the heel. By shifting your weight back and using the heel as your anchor, you unlock faster direction changes and smoother transitions between shots. The six drills in this guide target the split step, the pro glide, corner mechanics, and the V recovery. Master them, and you will cover the court with less effort and more control.
Why the Heel Changes Everything
When you watch a top PSA player move, notice their first step. It is not a sprint. It is a controlled rock back onto the heel, then a push forward. That small movement creates separation from the ground. It allows the foot to turn, to pivot, to redirect. If you are always on your toes, you are stuck. You can only go forward. You cannot rotate. You cannot lunge sideways without crossing your feet.
The heel pivot is the foundation of every good movement pattern in squash. It is what lets you change direction without losing balance. It is what lets you cover a wide ball without taking three extra steps. And it is what most intermediate players ignore.
Six Squash Footwork Drills to Refine Your Movement
These drills are ordered by complexity. Start with the first one. Master it before you move on. Each drill targets a specific weakness in your movement.
1. The Heel Rock and Split Step
This is the drill that fixes everything. Stand in your ready position at the T. Your feet should be shoulder width apart. Rock your weight back onto your heels. Feel the pressure shift. From that position, take one split step to your left. Then one to your right. Do not let your toes grip the floor. Keep the weight on your heels throughout.
- Repeat for 30 seconds.
- Increase speed gradually.
- Keep your torso upright.
The goal is to feel how much easier it is to change direction when your weight is back. Most players rush this drill. Do not. Slow down. Feel the pivot.
2. The Pro Glide Pattern
The pro glide is what makes elite players look like they are floating. They take fewer steps. They cover more ground. To practice it, mark out a rectangle on the court using the lines. Start at the back left corner. Move to the front left corner using only three steps. Then glide across the T line to the front right corner. Then back to the back right corner.
- Step one: heel rock and push.
- Step two: long lunge step.
- Step three: settle into the ready position.
This drill teaches you to cover distance without scrambling. It is one of the most useful squash footwork drills for players who feel they are always chasing the ball.
3. The Three Step Corner Rule
Corners are where rallies are won and lost. The three step rule says you should never take more than three steps to reach any ball that lands within two metres of you. To practice, stand at the centre T. Have a partner or a ball machine feed balls to the four corners of the court.
- Step one: identify the corner.
- Step two: pivot on your heel towards it.
- Step three: lunge and hit.
If you take more than three steps, you are over moving. Reset. Start again. This drill builds efficiency and forces you to trust your lunge.
| Drill | Primary Focus | Common Mistake | Correct Cue |
|---|---|---|---|
| Heel Rock Split Step | Weight distribution | Staying on toes | Rock back before moving |
| Pro Glide Pattern | Distance coverage | Taking too many steps | Use three steps max |
| Three Step Corner | Corner mechanics | Overrunning the ball | Lunge earlier |
| Reverse Lunge | Tight ball recovery | Bending at the waist | Keep chest up |
| V Recovery | Direction change | Crossing feet | Push off outside foot |
| Hold and Move | Deception | Moving too early | Delay your first step |
4. The Reverse Lunge for Tight Balls
A ball played tight to the side wall is hard to reach. Most players try to sidestep towards it. That takes too long. Instead, use the reverse lunge. Start at the T. When the ball goes to your right, step your right foot back and across your body. Lunge low. Keep your back straight. Hit the ball. Then recover by pushing off your back foot.
This drill protects your knees. It also keeps you in a position to hit the ball with power, not just reach it. Practice it ten times on each side before moving on.
5. The V Recovery Pattern
The V recovery is for those moments when you are stretched wide and need to get back to centre. Imagine a ball played to your deep left corner. You lunge for it. After you hit it, you do not shuffle back. You push off your outside foot and travel in a V shape back to the T.
- Push off the outside edge of your left foot.
- Drive your right foot forward.
- Settle into the ready position.
This pattern is faster than straight line movement because it uses the ground to generate momentum. It is a staple of advanced squash footwork drills.
6. The Hold and Move Technique
This is the deception drill. Stand at the T. Your opponent (or coach) shows you where the ball is going. You hold your position for half a second. Then you move. The hold forces you to commit to a direction based on the shot, not the body language. It also stops you from being faked out by a feint.
- Watch the racket face.
- Hold your weight on your heels.
- Move only when the ball is struck.
This drill trains your reading of the game. It also stops you from wasting energy on false starts.
Common Footwork Mistakes and How to Fix Them
Even experienced players fall into bad habits. Here are the most common ones.
- Staying on your toes all the time. You lose the ability to pivot. Fix it by doing the heel rock drill before every session.
- Taking too many steps. More steps does not mean faster movement. It means inefficient movement. Use the pro glide pattern to reset your step count.
- Crossing your feet when moving sideways. This puts you off balance and makes it hard to lunge. Keep your feet shoulder width apart. Use a split step instead.
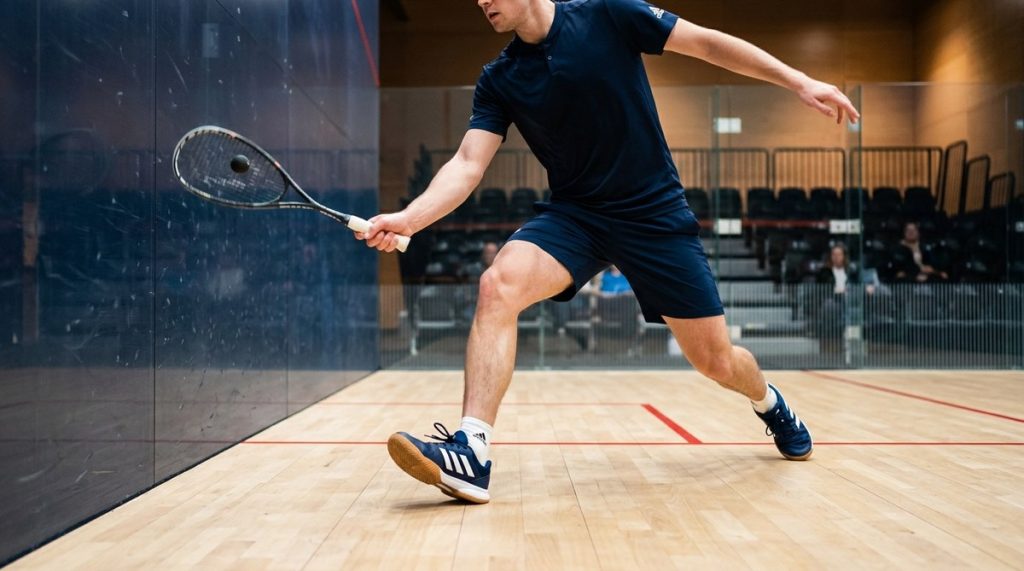
- Bending at the waist during a lunge. This puts strain on your lower back and reduces your reach. Keep your chest up. Bend at the knees and hips.
“The best players do not move more. They move better. Every step should have a purpose. If you are taking a step that does not get you closer to the ball, you are wasting energy.” — Lee Drew, Squash Coach
Building a Footwork Session
You do not need to do all six drills in one session. Pick two or three. Spend ten minutes on each. Focus on quality over quantity. Here is a sample session structure.
- Warm up with the heel rock split step for 3 minutes.
- Practice the pro glide pattern for 5 minutes.
- Run the three step corner drill with a partner for 10 minutes.
- Finish with the V recovery pattern for 5 minutes.
- Cool down with light ghosting on the T.
If you want to take this further, read about how to improve your squash footwork for faster court coverage. It pairs well with these drills.
The Role of Equipment in Footwork
Your shoes matter. If your soles are worn smooth, you will slip. If your shoes are too heavy, you will fatigue faster. For UK courts, a non marking gum sole is the standard. It gives you the grip you need to push off your heel without sliding. If you are unsure what to look for, check out the ultimate guide to selecting the best squash shoes for British courts in 2026.
Your racket grip also plays a role. If your grip is too thick, you cannot relax your hand. A relaxed hand leads to better racket head control. That matters when you are moving at speed. Read more about why your squash racket grip size actually matters more than you think.
How to Track Your Progress
Footwork improvement is hard to see in the mirror. Use your phone. Record a short clip of yourself doing the three step corner drill. Watch it back. Count your steps. Look at your weight distribution. Are you on your heels or your toes? Compare it to a clip from two weeks later. You will see the difference.
If you want a structured programme that builds over time, consider footwork fundamentals: the ladder drill programme that actually works. It gives you a week by week plan.
Making Footwork a Habit
You cannot fix your footwork in one session. It takes repetition. The best way to make it stick is to add one drill to your warm up before every match or training session. Start with the heel rock split step. Do it for two minutes. Then play your match. After a few weeks, you will notice that your first step feels different. You will feel more stable. You will arrive at the ball earlier.
The hidden power of your pivot is real. It starts at the heel. It ends with you winning more rallies. Get on court. Try these drills. Your legs will thank you.