5 Grip Mistakes That Are Ruining Your Squash Game
“`markdown
You step on court, ready to play. You’ve been practising your drives and volleys. Yet something still feels off. The ball doesn’t go where you aim. Your wrist hurts after twenty minutes. And your shots lack that crisp, clean sound you hear from better players. More often than not, the problem isn’t your swing or your footwork. It’s how you hold the racquet. Your grip is the foundation of every shot you hit, and 60% of club players make at least one fundamental error that holds them back. The good news is that fixing your grip can transform your game in a single session. Let’s look at the five most common squash grip mistakes and how to correct them.
Bad grip habits often feel natural because you’ve used them for years. But they limit power, control, and consistency. The five mistakes covered here are gripping too tight, using the wrong hand position, having a loose or bent wrist, choosing the incorrect grip size, and playing with a worn-out grip. Each fix is simple and takes only a few minutes to implement. Correcting them will improve accuracy, reduce injury risk, and boost your overall confidence on court.
The Hidden Cost of a Bad Grip
A poor squash grip doesn’t just feel uncomfortable. It changes the angle of your racquet face at impact. That means you have to compensate with your arm and body to get the ball on target. Over time, these compensations become ingrained, leading to inconsistent shots and unnecessary strain on your wrist and elbow. Many players assume their grip is fine because they can still hit the ball. But if you’ve ever wondered why your backhand volley keeps hitting the tin or why your drives lack depth, the grip is often the culprit.
Let’s take a closer look at the five most damaging errors and how to fix them.
Mistake 1: The Death Grip
You know the feeling. When the rally gets tight and you’re under pressure, your hand tightens around the handle as if you’re trying to strangle it. This is the death grip, and it’s the single most common mistake among club players.
Why It Hurts Your Game
Gripping too hard eliminates the natural whip in your swing. It makes your forearm muscles tense, which reduces racquet head speed. A tight grip also deadens the feel of the ball on the strings. You lose the subtle feedback that helps you judge pace and spin. On top of that, a death grip fatigues your forearm quickly, especially in long rallies.
How to Fix It
- Check your tension between points. When you’re waiting to receive serve, consciously relax your hand. The racquet should feel secure but not rigid.
- Imagine holding a bird. Your pressure should be just enough to keep the bird from flying away, but not so much that you crush it.
- Use the ‘finger trigger’ technique. Your index and thumb should do most of the work, while your other three fingers rest lightly on the handle.
A good test is to hold the racquet at rest and shake it gently. If the grip feels white-knuckled, you’re squeezing too hard.
Mistake 2: The Hammer Grip (Incorrect Hand Position)
Another frequent error is placing the hand too far up the handle or turning the racquet face in a way that restricts wrist movement. This is often called the hammer grip because it resembles holding a hammer. It’s common among beginners who learned to play without proper coaching.
What the Correct Grip Looks Like
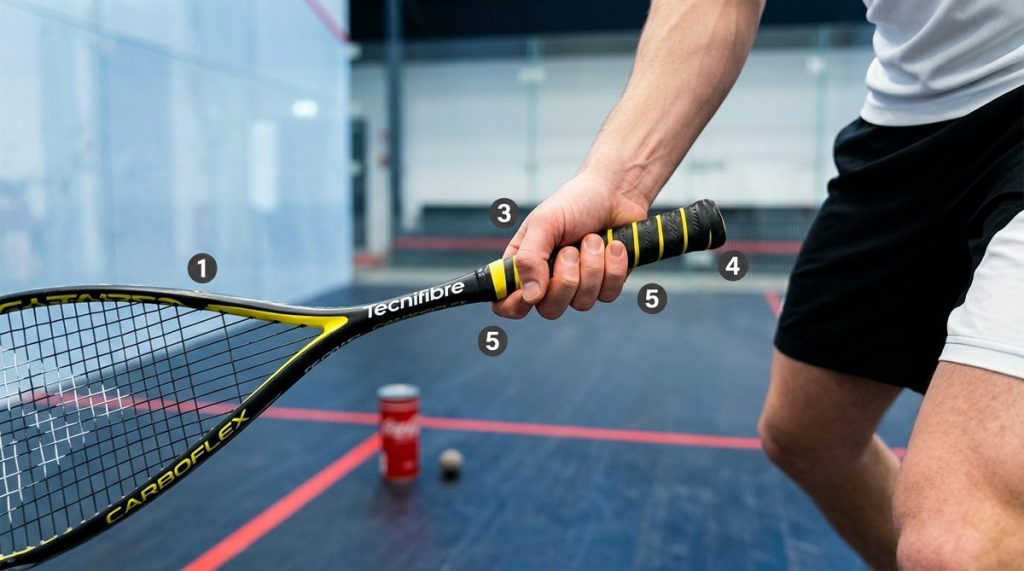
Your hand should sit at the very end of the handle, with the butt of the racquet nestling into the base of your palm. For a forehand drive, the V shape between your thumb and index finger should point roughly towards the top right corner of the racquet head (for a right-handed player). This allows you to use your wrist naturally to adjust the angle of the racquet face.
| Incorrect Hammer Grip | Correct Continental/V Grip |
|---|---|
| Hand placed halfway up the handle | Hand placed at the end of the handle |
| V points to the centre of the racquet head | V points to the top right edge (or top left for backhand) |
| Wrist locked and straight | Wrist relaxed and slightly cupped |
| Shots feel stiff and short | Shots feel fluid and long |
Take a moment to check your grip right now. If your V is pointing straight down the middle of the racquet, adjust it slightly towards the edge. This small change will give you more angle options on your drives and drops.
For more details on choosing the perfect fit, read our article on why your squash racquet grip size actually matters more than you think.
Mistake 3: The Lazy Wrist
A loose wrist is essential for generating racquet head speed, but many players take this too far. They let their wrist bend excessively at the top of the backswing or collapse at impact. This leads to a loss of control and a higher risk of hitting the tin.
The Correct Wrist Position
Your wrist should be firm but not rigid. Imagine you are holding a small ball in your palm. The back of your hand and your forearm should form a straight line at the moment of impact. Any bending or flopping of the wrist will change the angle of the racquet face unpredictably.
To train this, try hitting slow drives while keeping your wrist steady. Focus on using your shoulder and hip rotation to generate power, not your wrist snap. A good drill is to hit solo drives against the front wall, concentrating on keeping your wrist in a neutral position. For more solo practice ideas, check out our guide to solo court drills: 12 exercises you can do without a partner.
Mistake 4: Wrong Grip Size or Worn-Out Overgrip
This mistake is purely equipment related, but it has a huge effect on technique. If your grip is too small, you will subconsciously squeeze harder to maintain control. If it’s too large, you will struggle to release your fingers and generate wrist snap. A worn out overgrip becomes slippery, forcing you to grip tighter to stop the racquet twisting in your hand.
How to Check
- The ruler test. Hold the racquet in your dominant hand. If your fingers dig into your palm, the grip is too small. If there is a noticeable gap between your fingertips and palm, it’s too big.
- The wear test. Look at the grip. If it’s shiny, cracked, or smooth, it’s time to replace it.
- The moisture test. If your grip feels slippery after a few minutes of play, change it before your next match.
Expert Advice: “A fresh overgrip can make you feel like a different player. It gives you confidence to swing freely without worrying about the racquet slipping. Replace your overgrip every four to six weeks if you play twice a week.” — David Pearson, Level 3 Squash Coach
Mistake 5: Neglecting Grip Replacement
Even if you have the correct grip size and hand position, you still need to maintain the grip itself. Many club players use the same overgrip for months, sometimes years. Over time, sweat and dirt break down the tacky surface. The grip loses its cushioning and its ability to absorb shock.
The Solution
Schedule a regular grip change. As a rule of thumb, replace your overgrip every 10 to 15 hours of court time. If you play league matches, change it before the season starts. A fresh grip with good tackiness gives you a more secure hold, allowing you to relax your hand and play with better feel.
For more equipment tips, read our guide on how often should you really be restringing your squash racquet.
How to Check Your Grip in 3 Simple Steps
Instead of guessing, use this quick three-step process before every session or at the start of your warm-up.
- Hold the racquet loosely at your side. The racquet should hang naturally with the head pointing downwards. Your hand should be at the very end of the handle.
- Make a V with your thumb and index finger. For a forehand, the V should point towards the top right corner of the racquet head (for a right-hander). For backhand preparation, the V should angle slightly to the top left.
- Squeeze gently. The pressure should be light enough that someone could pull the racquet out of your hand without much effort. If you’re squeezing hard, relax.
Repeat this check every time you pick up the racquet until it becomes automatic.
Quick Fixes to Remember
Here is a summary of the five mistakes and what to do about them:
- Death grip: Relax your hand between points. Use a bird-hold pressure.
- Hammer grip: Place your hand at the butt of the handle. Point your V correctly.
- Lazy wrist: Keep your wrist firm at impact. Use shoulder rotation for power.
- Wrong size or worn grip: Measure your grip. Replace your overgrip regularly.
- Neglecting replacement: Schedule grip changes every 10–15 hours of play.
For more on how to develop a fluid swing, see our article on how to generate more racquet head speed without swinging harder.
Your Next Step on the Court
Grip mistakes are one of the easiest things to fix in squash, yet they cause the most frustration. The beauty is that you can correct all five errors without expensive equipment or extra court time. Spend ten minutes before your next practice focusing on relaxation and hand position. Hit a few solo drives while paying attention to your wrist. Replace that worn out overgrip. These small adjustments will make your shots feel cleaner, your arm feel fresher, and your confidence grow.
Go ahead and try it. Your future self on court will thank you.