The Hidden Art of the Squash Pause: Control the Rally with Delayed Strikes
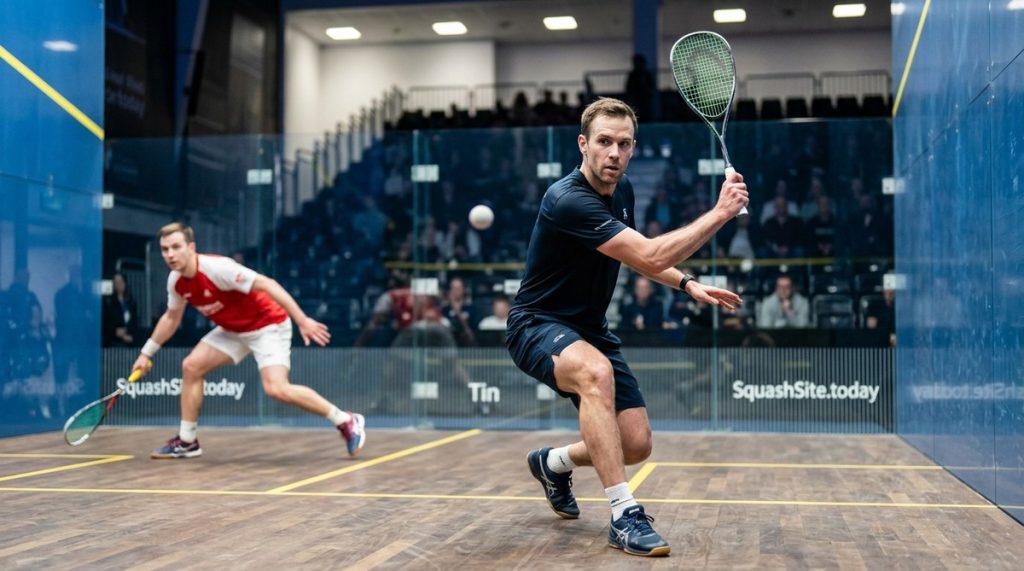
Picture this: you are mid rally, the ball is coming over the net in a high arc, and your opponent is already moving into position expecting a booming drive. Instead of hammering it back, you let the ball bounce. You wait. You let it drop a little lower, let the strings settle, and then you strike with a perfectly timed wrist flick that sends the ball into the empty space your opponent just left. That moment of hesitation, that controlled delay, is the squash pause technique. It is one of the most underused weapons in an experienced player’s arsenal. Most club players rush every shot. They panic when the ball comes to them and try to hit it as fast as possible. But the best players know that time is a resource. And the squash pause technique is how you spend that resource to win.
The squash pause technique is a tactical delay in your shot execution that disrupts your opponent’s timing and court positioning. By holding your swing for a fraction of a second, you force them to hesitate, adjust, or commit too early. This article breaks down how to practice it, when to use it, and why it wins rallies.
Why the Squash Pause Technique Works at Higher Levels
When you watch top PSA players, you notice something strange. They often look like they are moving in slow motion. They get to the ball early, set up, and then wait. That waiting is not hesitation. It is calculation. The squash pause technique works because squash is a game of anticipation. Your opponent watches your body language, your racket position, and your footwork to decide where to move next. If you take away those cues by delaying your shot, you break their prediction model.
Think about it like a goalkeeper in football. A penalty taker who pauses before kicking forces the keeper to commit early. Same principle here. You hold the shot, your opponent shifts their weight, and then you place the ball where they just were. The squash pause technique is not about being slow. It is about being deliberate.
The Three Types of Delayed Strikes
Not all pauses are the same. You can vary the delay based on the situation. Here are the three main versions of the squash pause technique you need to know.
The High-Ball Hold
This is the most common scenario. A high bouncing ball comes to your forehand or backhand side. Instead of hitting it at the peak of the bounce, you let it drop to around chest height or even lower. This gives you more time to read your opponent’s movement. It also changes the angle of your shot. A ball hit from lower down can be driven into the ground with more topspin, making it harder to return.
The Double-Bounce Delay
Sometimes the ball bounces twice before you can reach it. Most players panic and try to hit it on the first bounce. The squash pause technique here involves letting that first bounce go, adjusting your feet, and then attacking on the second bounce. This is especially effective when you are moving backwards or recovering from a deep lunge. It buys you that extra split second to regain your balance.
The Fake Swing
This is an advanced version. You start your swing, bring the racket back, and then stop. You let the ball pass your hitting zone and then bring the racket around late. The fake swing freezes your opponent because they see the backswing and start moving. Then you hit the ball behind your normal contact point, often catching them wrong-footed.
A Practical Process to Build the Squash Pause Technique
You cannot just decide to pause mid match without practice. It feels unnatural at first. Your instincts scream “hit it now”. Here is a step by step process to train the squash pause technique into your game.
-
Start with solo drilling. Stand on the T and toss the ball up high on your forehand side. Let it bounce once. Catch it with your racket face. Do not hit it. Just catch it. Hold it there for a full second. Then drop it and hit it into the front wall. Repeat 20 times. This builds the feeling of waiting.
-
Move to partner drills. Ask a training partner to feed you high lobs. Your only job is to let the ball bounce twice before hitting it. Do not worry about placement. Focus on the delay. Do this for five minutes each side.
-
Add a target. Once the delay feels comfortable, start aiming. Place a towel or a cone in the back corner of the court. Use the squash pause technique to let the ball drop, then drive it precisely to that target. The delay should improve your accuracy, not reduce it.
-
Introduce a live opponent. Play a practice game where you are only allowed to hit the ball after a visible pause. You must count “one thousand” in your head before every shot. This will feel awkward and you will lose some points. That is fine. You are rewiring your timing.
-
Integrate naturally. Now remove the counting rule. Just play with the intention of using the pause when you see an opportunity. Review your match footage to see how often you used it and whether it created openings.
Common Mistakes and Corrections
The squash pause technique is subtle. It is easy to get wrong. Here is a table showing the most common errors and how to fix them.
| Mistake | What It Looks Like | Correction |
|---|---|---|
| Freezing completely | You stop moving your feet while waiting. | Keep your feet active. Small steps or a shuffle. A pause in the swing, not in the movement. |
| Waiting too long | The ball drops below your knee and you cannot generate power. | Set a mental limit. Let it drop to hip height maximum. Anything lower and you lose leverage. |
| Telegraphing the pause | You visibly slow down your backswing. | Keep your backswing normal. The pause happens at the top of the swing, not during the takeback. |
| Using it on every shot | Your opponent adapts and starts waiting too. | Use the squash pause technique sparingly. Two or three times per rally is enough. Overuse kills the surprise. |
When to Use the Squash Pause Technique in a Rally
Timing is everything. You do not want to pause when your opponent is off balance. You want to pause when they are perfectly set. Here are the three best moments to insert a delayed strike.
- After a high lob from your opponent. If they have just hit a defensive lob, they are recovering their position. They expect you to hit it back hard and fast. A pause forces them to stop moving forward and wait. Then you place the ball behind them.
- When your opponent is moving sideways. If they are shuffling along the baseline waiting for your shot, a pause makes them overcommit. They stop, you hit it the other way.
- In the third or fourth shot of a rally. Most players have a pattern. First shot is a feeler. Second shot is aggressive. Third shot is the kill. If you pause on the third shot, you break that pattern completely.
The Counter-Intuitive Truth About Speed
Here is something that surprises most players. Using the squash pause technique can actually make your game faster overall. How? Because you stop wasting energy on rushed, poorly placed shots. When you pause, you hit the ball with more intention. You choose a better target. You use a cleaner swing. That means fewer unforced errors, fewer balls hitting the frame, and fewer easy returns for your opponent.
A rushed shot is often a weak shot. A delayed shot is a controlled shot. And control beats raw speed every time in squash.
“The best players I have coached do not hit the ball earlier. They hit it later, but with more purpose. The pause is where the thinking happens.” — A note from a top UK squash coach, shared during a 2026 coaching clinic.
Building a Training Session Around the Pause
If you want to make the squash pause technique a permanent part of your game, dedicate one training session per week to it. Here is a suggested structure.
- Warm up with standard movement drills for five minutes.
- Do the solo catch and hold drill for ten minutes.
- Partner drill with two bounce rule for ten minutes.
- Practice game with the “count to one” rule for fifteen minutes.
- Free play for ten minutes with the goal of using three pauses per rally.
Track your success. How many of those pauses led to a winning shot? How many felt forced? Adjust the ratio as you improve.
Why This Technique Separates Good Players from Great Ones
Most club players can hit the ball hard. Most can move well. But the ability to control the tempo of a rally is what separates the top of the ladder from the rest. The squash pause technique is a direct way to take control. It says to your opponent “I am not reacting to you. You are reacting to me.”
When you combine this with solid footwork and good court positioning, you become a much harder player to read. Your opponent cannot settle into a rhythm. They have to stay on their toes, literally and mentally. That mental fatigue adds up over a match.
If you want to dig deeper into related tactics, check out our guide on the art of deception: adding holds and disguise to your game. It covers similar principles of breaking your opponent’s timing with shot disguise.
Putting the Squash Pause Technique into Your Match Strategy
You do not need to be a professional to use this. You just need the discipline to practice it. Start in your next club session. Pick one rally and commit to using a pause. See what happens. The first few times it might feel clumsy. That is normal. But once you feel the satisfaction of watching your opponent stumble because they committed too early, you will understand why this technique is so powerful.
Squash is a game of inches and milliseconds. The squash pause technique gives you control over both. Use it wisely, and you will find yourself winning rallies you used to lose.
Your Next Step on the Court
Grab your racket, find a wall, and start the solo catch drill tonight. Ten minutes of holding the ball on your racket face. That is all it takes to begin rewiring your timing. The rest will follow.